- Upgrade
- Posted
Derbyshire upgrade blitzes Enerphit target
Hitting the Enerphit standard can be challenging for even the most seasoned passive house specialist, so what chances did Kate and Geoff Ball’s semi-d have when the architect and builder had no passive experience? With a well-planned approach and no end of enthusiasm, they passed with flying colours, as Kate Ball explains.
We began house hunting late in 2009 as a couple with two small children and an interest in ecology and green building. We were looking for a bigger home which had the potential to be made more eco-friendly.
Having moved in May 2010 into a house which needed quite a bit of work doing, but which had the perfect location for us and a generous garden, we took a year to plan and decide that going all-out and doing a complete retrofit to the Enerphit standard would be the best long-term strategy in ecological, financial and comfort terms.
With our aims firmly in mind, in the summer of 2011 we approached ReDesign, a local architect with an interest in energy efficient and eco-friendly building practice, though no prior experience of passive house work. They helped us greatly to refine and finalise the general design and suggested Burton Building Solutions as the main builder – again, a business with an interest in learning more about energy efficient building but no passive house experience. We worked closely with the builders from the earliest design stages to ensure that as many as possible of the more complex elements of the design, from airtight layer continuity to elimination of cold bridges, could be dealt with before starting on site.
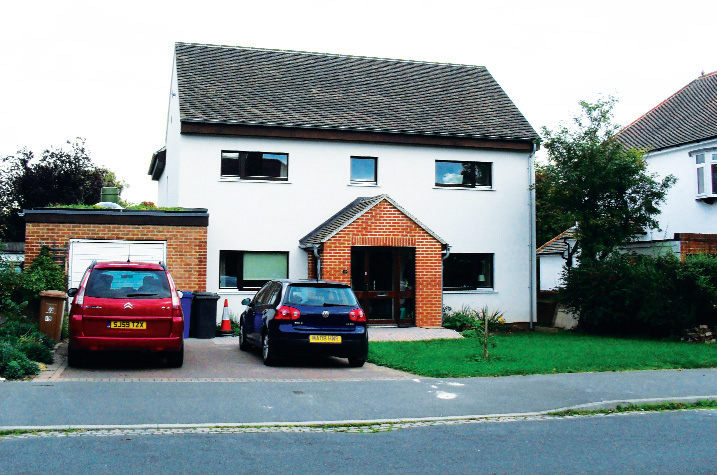
We borrowed the basic design for the retrofit from the fantastically detailed information Andy Simmonds [CEO of the AECB and partner in Simmonds Mills Architects] has provided for his Grove Cottage project, then used the AECB’s details to refine certain elements. This allowed us to get reasonably close to Enerphit standards with the first iteration of the design, saving costs and allowing us to concentrate fully on the very unfamiliar demands of passive house retrofit.
As a team composed entirely of novices, we approached Alan Budden from Ecodesign Consultants to help us determine the feasibility of our ideas and to ensure that our end result would be able to be certified as Enerphit (provided we installed everything correctly).
Between all of us, the design was tweaked repeatedly, and then tweaked again when John Trinick from Warm did the certification PHPP modelling before we started the build.
For airtightness, Paul Jennings from Aldas looked over our protocol before the build and provided a day of training in the early build stages for all of the main people involved in the project. We believe this was instrumental in allowing us to achieve a good airtightness result, since afterwards everyone fully understood what would be involved in sealing the house.
Given that the house was habitable and large, if rather leaky, we decided to live in the house throughout the retrofit. We knew that with young children, living in the house during the build wouldn’t be the easiest option, but we decided that the benefits of being on site throughout the project would far outweigh the discomfort (except for the bit where the floors were dug out – we camped out with family for two weeks!). This did result in a lot of moving of furniture (mostly into a storage unit) and lots of washing up in the bathroom basin, but was in the main good fun – though it would have been nicer in a less rainy year.
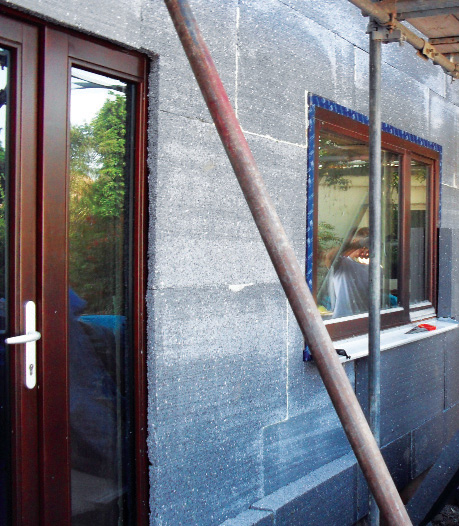
External wall insulation showing door overlapped by first layer and second layer being installed
During the build, we encountered a variety of issues – from the asbestos tiles we found under finger parquet, which was itself under a carpet we removed the week before building started, to the discovery of a missing damp proof course in the original house walls, to the repeated flooding of the trench during below- DPC external wall insulation installation. This last issue led to the insulation floating off the walls repeatedly, until the main builder – rather than the specialist sub-contractor – suggested a pump to keep the trench empty. The pump had no level cut-out, so needed exhaustingly regular checking day and night to prevent burnout until the trench was backfilled.
The greatest worry we had during the build was about the airtight layer. Even with rather erratic external wall insulation contractors, it was a simple enough job to supervise and ensure that the brick parge coat was installed continuously. But we had read repeatedly about the dangers of weather exposure for airtight products, and the need to keep everything dry – and this in the wettest summer on record. Many hours were spent re-taping slightly wind-torn staple holes in the pitched roof Intello layers, and even slashing holes into the flat roof Intello to permit the lakes of water which had gone through the tarpaulins and the as-yet-unsealed OSB to flow into the utility room and allow the roof to dry out. We stuck to the rule of only putting airtight tapes onto completely dry substrates, and remarkably this seemed to work. The tapes didn’t move at all, even in areas where the sequencing of external wall insulation with flat roof insulation meant that various sections of tape spent a fair while wet. Our final air test result of 0.32 ACH, with the only noticeable leakage around door locks and corners, would seem to indicate that our policy of doubling up all the airtight layers on the timber framed sections was a good idea, particularly since some of the OSB did get very wet, which may well have affected its airtightness.
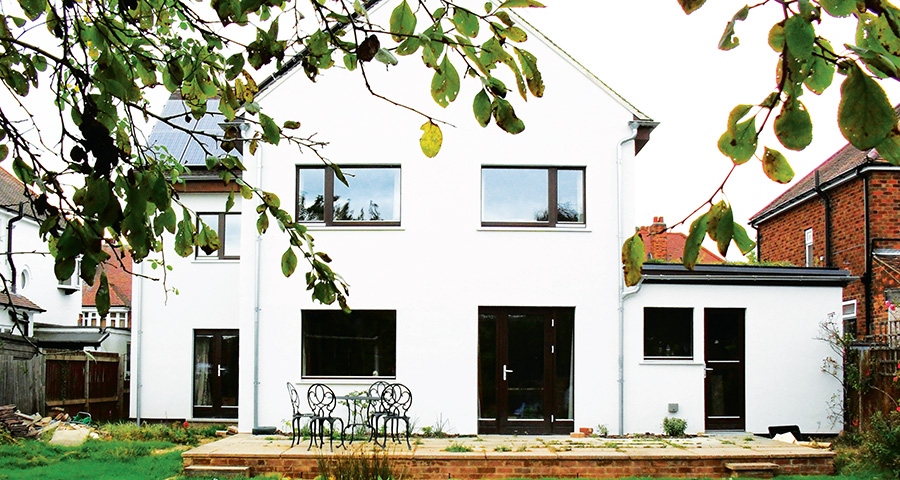
The UK’s favourable feed-in tariff meant it was financially (if not necessarily totally ecologically) viable to install solar panels. The 3.96kWp up-cycled panels from Innotech were installed by Ethical Solar. We were delighted to find a company upgrading seconds quality solar panels for more long-term use than solar powered toys. Meeting the deadline for the Autumn 2012 feed-in tariff reduction was difficult due to weather and sub-contractor related delays, and led to a strange construction sequence in which the south roof of the extension was fully sealed, insulated and tiled while the north roof still had only the Ibeams in place. Due to the positioning of the house, the panels are pleasingly un-ostentatious – people who visit assume the house does not have them, which lets us lecture them on all the insulation and convince them that the house really is eco-friendly before solar panels are even considered!
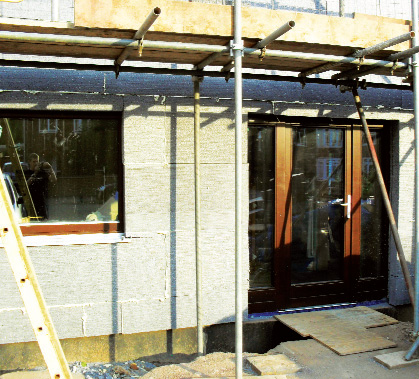
Two layers of insulation installed across frontage
One regret would be that as a novice team, we had so much to concentrate on that we did not manage to use the most environmentally friendly insulants, where contractors were determined to use more familiar products. This has led to the use of PIR in the project under floors and on the flat roof, when we would have preferred to use the same EPS as the external walls, if only to make recycling the house many years in the future simpler. Ideally, timber waste-based insulation would be our insulant of choice given unlimited space and finances.
Another slight issue – though this one was resolvable – was that the very large roof ridge beams provide our most noticeable thermal bridge. With our warm roof construction, this weirdly meant that snow melted from the ridge of our roof sooner than from the roofs of insulated (and I suspect under-heated) cold roof houses on the road. We intend to rectify this by installing 400mm mineral wool insulation under the ridge beam in the attics, to make the conductivity of the ridge area approximately equal to the conductivity of the rest of the roof.
Probably our favourite part of the project now is the MVHR – which is a surprise since we didn’t expect it to work anywhere near as well as it has. It dried out the house beautifully when it was first turned on in the winter, making decorating rooms far faster than it would have been, and solving all the unpleasant damp issues which occur with a family-worth of laundry in a normal house in cold weather. In the summer, the filters are doing their work very nicely: Much as we love having open windows and hearing the birdsong, closed windows and a very low internal pollen count are helping the hayfever sufferers in the household no end.
The question of occupancy in a large house was something we were concerned about, having realised early on that while a small house with high occupancy will look worse on PHPP than a large house with low occupancy (since that works on floor area, not number of people), in real terms the energy used per person may well be lower in a smaller, less energy efficient house than in a larger, more energy efficient house. The first floor two-bedroom extension and utility extension left us as a family of four using two bedrooms of a five bed house. We have been lucky to find two additional housemates to bring our occupancy up to six, which seems a bit more reasonable for the space we have – and has the added advantage of helping to pay off the mortgage. Adding in a small child minding business and voluntary home educating groups all run from the house, the occupancy looks really quite good.
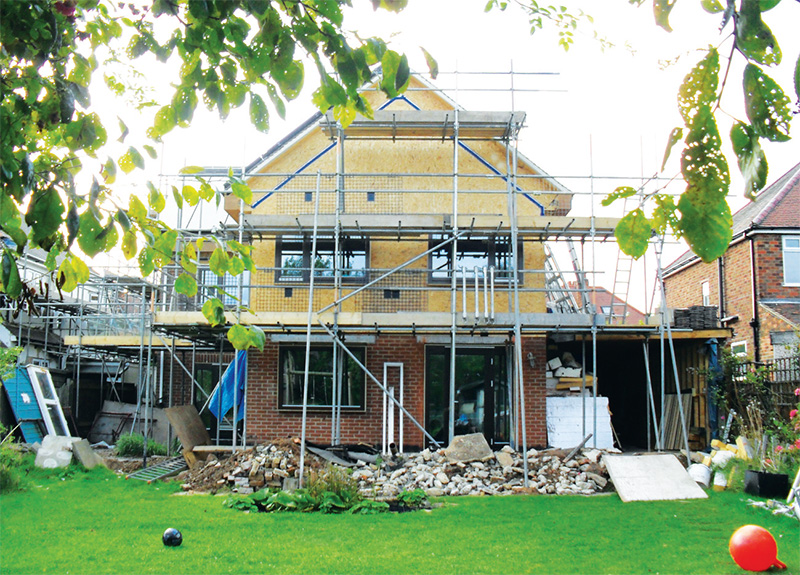
The calculated space heating demand comes in at 23.1kWh/m2/yr. Entertainingly, if you change our house from normal residential to student/old peoples' home, the figure drops to about 13 kWh/m2/yr. We're hoping we'll perform near this figure. We do actually have two students living in the house, and I work from home, run voluntary groups here and home educate our kids, so our occupancy is very high
Part of our hope in undertaking this retrofit was to provide ideas for other people looking to improve the energy efficiency of their own homes. To this end, we joined the Superhomes network and are holding various tutorial sessions and open days throughout the year to help make simple energy efficiency measures more accessible to local people.
Selected project details
Client: Geoff and Kate Ball
Architect: Nigel Turner, ReDesign
Passive house Enerphit consultant: Ecodesign Consultants
Structural engineer: David Bayliss Consulting
Main builders: Burton Building Solutions
Airtightness trainer & tester: Paul Jennings, Aldas
External wall insulation: Permarock
Windows & doors: Green Building Store/Drewexim
Airtightness tapes, membranes & grommets: Ecological Building Systems
MVHR system: Paul Novus 300
Ventilation ductwork: Lindab
Flat roof waterproofing: Sarnafil
Solar PV: Ethical Solar
Additional info
Project overview:
Building type: 1950s east-west facing brick built two-storey detached house
Location: urban site, Derby
Budget: approx. £170k
Certification: Enerphit certified
Space heating demand
Before: 153 kWh/m2/yr
After: 23 kWh/m2/yr
Heat load
Before: unknown
After: 11 W/m2
Primary energy demand (PHPP)
Before: 403: kWh/m2/yr
After: 115 kWh/m2/yr
Energy performance certificate (EPC)
Before: The pre upgrade EPC stated the house had full loft insulation, full double glazing, full cavity wall insulation, full thermostatic control on the heating etc, none of which was accurate, rendering the EPC worthless.
After: Unknown
Energy bills
Before: £128 per month on gas and £37 per month electricity in 2011-12 (house occupancy 4)
After: £26 per month on gas and £30 per month electricity in 2013 (house occupancy 6)
Airtightness (at 50 Pascals)
Before: >10 ACH
After: 0.32 ACH
Ground floor: original floor dug up, adding 180mm PIR insulation with 100mm PIR down-stands to footings and 30mm phenolic up-stands to prevent slab contact with wall to reduce thermal bridging. Total floor U-value: 0.119
Walls
Before: (variously) unfilled cavity wall, solid brick wall, and mineral wool filled brick-brick cavity wall or brick-block cavity wall.
After: Permarock external insulation system including 250mm graphite EPS in two cross-bonded layers, airtight cementitious parge coat, external layer of brick, cavities all filled with mineral wool where cavity exists (cavity between 0 and 80mm on different walls), internal layer brick or block, again different construction on different walls. U-Value 0.102
Extension walls: timber frame walls – 250mm graphite EPS in two cross-bonded layers, airtight layers of taped 18mm OSB then taped Intello membrane; 100x50mm studs filled with mineral wool, then plasterboard. U-Value 0.100
Existing roof
Before: uninsulated slate roof with some mineral wool laid flat between ceiling binders but with many gaps in the insulation.
After: slates, battens, breather membrane, 18mm OSB, 400mm mineral wool between I-beams, taped Intello airtight layer then taped OSB airtight layer, pre-existing 3x2in rafters. U-Value 0.118
Extension roof: pitched roof as existing roof without 3x2 rafters. Flat roof has 70mm growing medium and mixed vegetation, water retentive and protective layers, Sarnafil waterproofing, 180mm PIR insulation in two cross-bonded layers, airtight layers of taped OSB then taped Intello membrane, roof joists filled with leftover graphite EPS then plasterboard. U-Value 0.085
Windows & doors
Before: rotten timber-framed single & double glazing
New triple-glazed windows: Green Building Store EcoPassiv Passive house suitable triple glazing with timber frames. U-Value 0.87-0.97
Heating system
Before: >25 year old gas boiler & 15 radiators
After: new gas fired Veissmann A rated combi using approximately three of the remaining seven radiators during last winter.
Ventilation
Before: no ventilation system. Reliant on infiltration, chimney and opening of windows for air changes.
After: passive house certified Paul Novus whole house mechanical ventilation systems with heat recovery, over 90% efficient, connected to Lindab steel ducting.
Green materials: re-use of existing carpets etc. where possible, FSC certified timber throughout build, use of reclaimed parquet through ground floor.
Electricity: 3.96kWp solar PV system
Image gallery
Passive House Plus digital subscribers can view an exclusive image gallery for this article. Click here to view


